July 31st, 2024

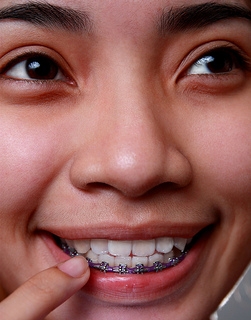
These days, fewer and fewer braces show up in school yearbook photos. Invisalign clear aligners have become a popular choice for our adolescent patients because it enables them to display metal-free smiles while straightening their teeth!
Dr. Byron Diehl can help you determine whether Invisalign treatment is right for you, but below are a few reasons why so many teens are choosing it today.
More Free Time
Invisalign Teen aligners require fewer appointments, which is pretty important to teens who value their free time. Invisalign treatment gives you straight teeth without having to miss activities or skip hanging out with your friends. It’s a win-win!
Eat, Brush, and Floss Easily
Traditional braces can make eating, brushing, and flossing both difficult and tedious. Invisalign aligners are easily removable for all these important activities, and give you freedom to live your life as usual.
Metal-Free Braces
Possibly the best perk of Invisalign aligners is that you can’t see them! The Invisalign system uses a clear plastic device that fits directly over the teeth. This means no metal parts to mar the appearance of your smile, so your Invisalign aligners will straighten while allowing your pearly whites to shine through. People don’t even have to know you’re straightening your teeth with Invisalign aligners.
To learn more about Invisalign Teen treatment, feel free to reach out to our Redlands, CA office!
July 24th, 2024
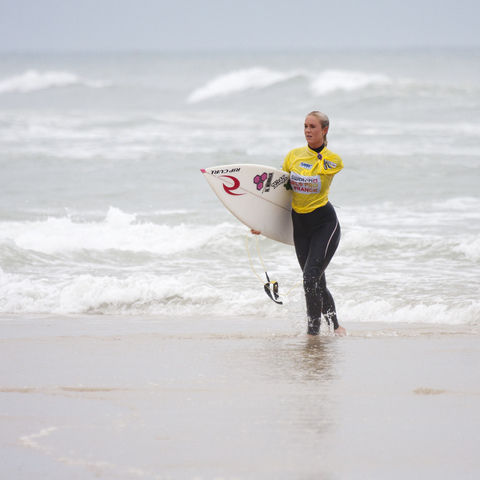
In Hollywood, a world where image and beauty is just about everything, many celebrities take the time to fix flaws in their appearance that make them feel uncomfortable. One of those such celebrities is soul surfer Bethany Hamilton, who chose to straighten her teeth using Damon Smile braces, an orthodontic treatment we proudly offer at Diehl Orthodontics that combines patented "tie-less" braces with advanced memory wire.
Hamilton, who overcame an injury from a horrific shark attack to return to professional surfing, chose Damon Smile to perfect her smile. With her choice, she showed children, teens, and adults who are apprehensive about orthodontic treatment that even celebrities get braces.
At age 14, Hamilton began her orthodontic treatment for a severe underbite with significant crowding and a narrow arch. She also had an open bite, which meant there was an open space between her upper and lower teeth when her jaw was closed. These types of cases are typically among the most difficult to treat and often require surgery. Hamilton relied on Damon Smile rather than traditional braces for her treatment.
If you have been thinking about an orthodontic procedure, come see us at Diehl Orthodontics for an assessment to see if Damon Smile is right for you! Give us a call today at our convenient Redlands, CA office!
July 17th, 2024
Did you know that even in ancient times, people wanted to improve the look and function of their smiles? Diehl Orthodontics thinks of modern orthodontic appliances as sleek, efficient technology, but this was not always so! Take a look at the highlights in the evolution of braces.
Ancient Times: From Greece to Rome
- According to The Angle Orthodontist, Aristotle and Hippocrates first thought about methods for straightening teeth between 400 and 300 BC.
- The Etruscans, in what we now know as Italy, buried their dead with appliances that maintained spaces and prevented collapse of their teeth and jaws during life. Archaeologists have discovered mummified remains in various locations that have metal bands wrapped around the teeth.
- A Roman tomb has also been discovered in which the teeth were bound with gold wire, including documentation on the wire’s use as a dental device.
18th Century: A French Development
- The French dentist Pierre Fauchard is acknowledged as the father of modern dentistry. In 1728 he published a book that described various methods for straightening teeth. Fauchard also used a device known as a “blandeau” to widen the upper palate.
- Louis Bourdet was another French dentist who published a book in 1754 that discussed tooth alignment. Bourdet further refined the blandeau and was the first dentist to extract bicuspids, or the premolar teeth between canines and molars, for the purpose of reducing tooth crowding.
19th Century: Orthodontics Defined
- Orthodontics started to become a separate dental specialty during the early 19th century. The first wire crib was used in 1819, marking the beginning of modern orthodontics.
- During this period, gold, platinum, silver, steel, gum rubber, vulcanite, and occasionally wood, ivory, zinc, and copper were used — as was brass in the form of loops, hooks, spurs, and ligatures.
- Edward Maynard first used gum elastics in 1843 and E. J. Tucker began making rubber bands for braces in 1850.
- Norman W. Kingsley published the first paper on modern orthodontics in 1858 and J. N. Farrar was the first dentist to recommend the use of force over timed intervals to straighten teeth.
20th Century: New Materials Abound
- Edward Angle developed the first classification systems for malocclusions (misaligned teeth) during the early 20th century in the United States, and it is still in use today. Angle founded the American Society of Orthodontia in 1901, which was renamed the American Association of Orthodontists in the 1930s.
- By the 1960s, gold was universally abandoned in favor of stainless steel.
- Lingual braces were the “invisible” braces of choice until the early 1980s, when tooth-colored aesthetic brackets made from single-crystal sapphire and ceramics became popular
Today
As we arrive in the present, you need only look at your own braces to see how far we’ve come. Your treatment plan was probably created with a 3D digital model, and we’ve likely used a computerized process to customize your archwires. Perhaps you have clear aligners, self-ligating brackets, or highly resilient ceramic brackets with heat-activated wires.
Orthodontics has come a long way from the days of Aristotle, and even the bulky wrap-around braces of just 60 years ago. Regardless of your specific treatment plan, the development of high-tech materials and methods has made it possible for your orthodontic experience to be as effective, efficient, and comfortable as possible. Call our office in Redlands, CA to schedule your first orthodontic consultation!
July 10th, 2024

Dr. Byron Diehl and our team are excited to offer Invisalign Teen, a clear alternative to braces that’s just for teens! With Invisalign Teen, we are able to straighten your teen’s teeth without the hassle, discomfort, and embarrassment of traditional braces.
Invisalign Teen’s clear aligners are virtually invisible. What's more, they are removable, which means your child is free to eat anything they choose, as well as brush and floss with ease! And best of all, Invisalign Teen uses no wires or metal to straighten your teen's teeth.
Invisalign Teen aligners are made from a lightweight plastic material and fit precisely on the teeth. Invisalign Teen has become a popular treatment here at Diehl Orthodontics because it helps our younger patients achieve a straight, beautiful smile without their friends noticing.
Our team at Diehl Orthodontics is aware that most teens today have a busy lifestyle, and sometimes, they tend to lose things, including their retainers or aligners. But with Invisalign Teen, if your child happens to lose an aligner, let Dr. Byron Diehl and our team know as soon as possible and we will have the aligner replaced.
For more information on Invisalign Teen, please give us a call at our convenient Redlands, CA office today!